Friday, February 24, 2012

Smashing Balls (baked cotton balls)

I saw these awhile ago on Kiboomu and then was reminded of them again while I was poking around at Play Create Explore (seriously, such a great place to spend some time!).  They are BAKED cotton balls! So fun.  All you need is some flour, water, food coloring and cotton balls! Place them on a greased cookie sheet or aluminum foil, bake for about 45 minutes at 300 degree's. Yep, that's it.  Maybe a hammer too. 

Pretty, huh? 

mix 1 cup water, 1 cup flour

add some color (we used food coloring)

toss in the cotton balls and cover with mixture

place on cookie sheet (I covered it with aluminum foil because I didn't feel like chipping the mixture off).

Hand 'em on over to the kids!  Enjoy the action!

Update:  Apparently some people who tried this felt that the bottoms were flat and a little sharp.  Mine also had some edges on the bottom but I simply cut those edges off with scissors.  I would LOVE to hear what you did with them if you tried making them!

I also get many questions about what exactly to do with these.  For me, I think they are amazing.  You can use them the way we did, which helps improve hand/eye coordination, a great sensory and science experience and a nice lesson in cause and effect. Many people have asked me "What is the Point?" My answer is, why ask? Just try it.  There doesn't always need to be a "point" or end result for a kid to explore, create and just play. Part of playing is cleaning up, so I don't have any issues with the kids helping me clean the mess they created.  I also like to use trays when we have experiences like this, as it helps define the space they are using and contain the contents. 
Here are some other folks that have made Smash Balls and how they use them.  Feel free to leave a comment letting us all know how you used them.  Inquiring minds want to know!

Tot Treasures used them to make Dino Balls.
Wonderbaby used them as a sensory experience here
Loving My Nest made them here,
Lil Mop Top used them to practice their sight words here
and
Artsy Mama Creative Kids made them here.


Pin It

Thursday, February 23, 2012

Princesses (and Lego's) on Ice

So I saw this idea over on Play Create Explore and thought it looked like so much fun.  I put a cookie sheet in the freezer and poured in some water.  I asked R to choose which of her princesses she wanted to put on ice and then the same for T's Lego figures.  The princesses wouldn't fit in the ice cube tray so I used plastic bottle lids from our stash. The figures wouldn't come out of the lids but they still slid on the ice anyway.  It was a blast!  The kids played until the ice melted and then asked me to freeze them again. Thank you so much Play Create Explore for this FABULOUS idea!


Pin It

Wednesday, February 22, 2012

Robots using Recyclables

If you have been following me for awhile now, you know that my son LOVES to build and create.  Mostly he loves Lego's, but anything he can create and build with is right up his alley.  He asked if I would help him build a robot.  So we looked in our supply of recyclables for what he thought he might need.  This is what he chose;
- plastic lids
- tin cans of various sizes
- plastic bottles
- cardboard tubes
We got out the glue gun and began construction.  He began to get frustrated when his robot would not stand up (it was top heavy).  I suggested we add something heavier to the bottom of it.  He thought about it for a minute and then ran outside to get a couple rocks.  He stuck these in the bottom cans. He then named him Rock Robot and wrote that on the arms.  
I just smile looking at these cute robots. 
My kids worked so hard and did all their own construction and hot gluing. It took a lot of problem solving and truly enjoyed watching them come up with their solutions.
These were so fun to create.  I highly suggest you give it a try.

our supplies

Hot Gluing

learning about balance

language, writing, letters recognition, small motor

Rock Robot


Pin It

Monday, February 20, 2012

Fun With Kool Aid

I just love Kool-Aid.  It is so useful.  You can paint with it, color snow with it, put it in your play dough....oh, and drink.  So here is how we use the cool stuff!


Add a shake or two to some water to make water color-like paint


It snowed a few days ago, so we gathers some of that fluffy, white stuff up and brought it in. (You can also do this outside, using spray bottles). We added the Kool-Aid to water and this tiime we used pipettes (droppers). We squirted the colors onto the snow and at first it was quite pretty. Until it all turned brown from so much color. Not as pretty, but defiently fun! So if you happen to have snow where you live, give this a go. Kept us engaged for a long time!


Pin It

Friday, February 17, 2012

Cake Mix Playdough

I got this fabulous recipe from Lisa Murphy's Ooey Gooey Tooey book.   You will need:
1 box of cake mix (any type will do)
2 cups of flour
1 1/2 cups of salt
6 tsp of cream of tartar
6 tbls oil
3 cups of water
Mix it all in a bowl (we used an electric mixer).  Then pour into a pot and cook on medium heat until the dough begins to form a ball.  Plop it on the counter and let it cool.  Knead until it is soft and pliable. This play dough, if kept in an airtight container) will last for weeks.  It is so fun and smells incredible.


Pin It

Friday, February 3, 2012

Balls + Hair Dryers = Physics

So, I had the hair dryers out for something completely different.  This is what happened.


Seriously, my kids kept at this for the better portion of an hour!  They tried various balls, two at a time, small, big, heavy, light.  It was so exciting to see the results of their different "air" experiments.  Oh and the language!!  Gravity, inertia, velocity!  Oh my language!  It was really great!  I am always amazed at what can be taught with the most simple items. 
You will need some balls (light weight, plastic ones work the best) and a hair dryer. 
Blow away!


Pin It

Flyswatter Painting (minus the paint)

We love painting (well, whacking) with flyswatters.  I love doing this activity outside, well because, it's MESSY!  I don't care about messes usually, they clean up, the memories that we create last forever!  However, cleaning paint off my floors and cabinets takes time away from playing with my kids.  Sooooo, we did flyswatter painting with WATER!  It was a lot of fun too.  We still had the satisfaction of whacking,  splattering and making prints, yet virtually no cleanup.  We loved talking about evaporation and absorption AND we we able to swat all we wanted because our work kept disappearing! 
All you need is some big paper, fly swatter and a shallow pan of water.  I used a cookie sheet with just enough water to get the swatter wet. 
 Have at it kids!


Pin It

Monday, January 30, 2012

Peeling Crayons (the easy way)

Wanna hear a secret??? 
Did you know that if you soaked crayons in water the wrappers peel right off?  Yep, it's true.  I tried it!  We were going through our crayons, separating all the broken ones out to do some recycling with.  I don't know about you, but I get real tired, real fast of peeling those wrappers off....crayon all stuck under your nails and all.  So, I thought, "okay, if paper gets wet, it gets soft".
 Not brain science but a most incredible moment for us!  OH YEAH! 
 Here is the proof.


Can you see the papers simply peeling right off??? 
p.s.  the Crayola brand peels the quickest.  These had only soaked for about 10 minutes before they began to peel off. 
Yippee!!
Pin It

Friday, January 27, 2012

Metamucil Slime

I have tried making this before with disastrous results.  I had this entire bottle of generic Metamucil just staring at me, tauting me really, in the closet.  So, we gave it another go. 
First, we dissolved 1 tablespoon of Metaucil in 1 cup of water.  Make sure it is in a rather large bowl.  Then, place in the microwave for around 4 or 5 minutes.  Watch it closely, as it bubbles up.  If it overflows into your microwave it is not easy to clean out (trust me on this one....I know).  Next, let it cool for about 1 min.  Microwave again for 4 or 5 minutes.  Follow this cycle 4 times.  Let it cool (it will be HOT).  It turns into the coolest slime.  You can even cut it with scissors.  This batch made the amount that you see in my daughters hands.  Enough for one person to have a slimy time with!


Pin It

Monday, January 23, 2012

Silly Bands DIY Puzzles

We have tons of these Silly Bands. Since my kids don't really wear them, I am always looking for ways to use them.  We have stuck them to sticky paper and extracted them from ice (click on the underlined words to see how).  Today I thought we could use them to make puzzles.  My two love puzzles and puzzles are great for problem solving, using math/matching skills and using our fine motor skills.  So, we took our silly bands, put them on the copier, made a copy, then matched our silly bands to the shape on the paper.  So easy peasy and my kids loved making their own.  Lots of options too!


Pin It

Friday, January 20, 2012

Playing with Toddlers

Since most of my post are geared towards preshool ages (like my own), I thought it might be helpful to share how we engage our toddler groups too. I am talking babies and up. Most of these my preschoolers enjoy too! Here are some of the ways we encourage discovery and learning with our Little's.

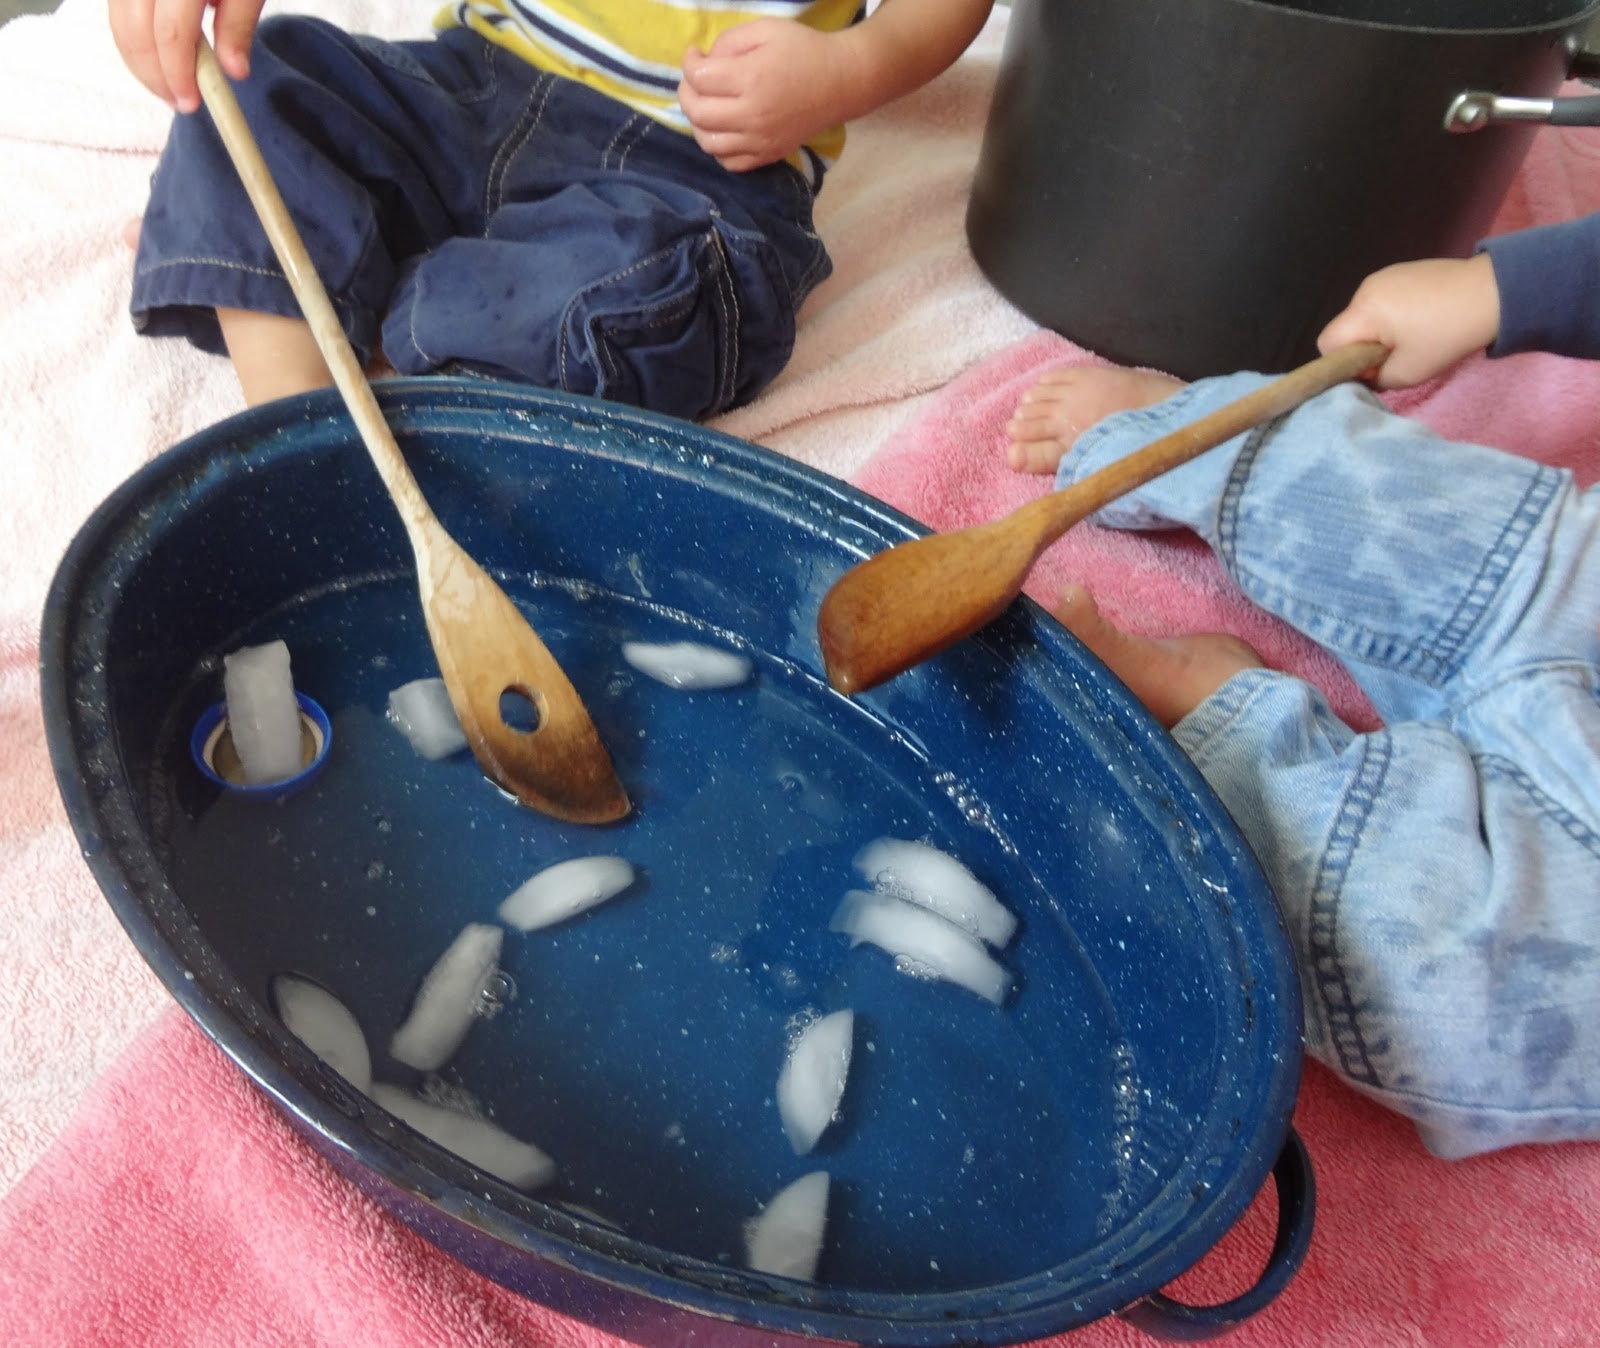
ice cubes in shallow water with scoops and spoons
(the pot behind them is filled with warm water, for comparing)
Baby ball pit (balls in a pack n play)
an empty box = hours of entertainment

metal bowls and wooden spoons


old Cd's hanging in a window make amazing rainbows
 and on the floor, in front of a sunlit window,
 they make great reflections on the ceiling

Sensory Bottles, there are endless possibilities....
 1/2 oil + 1/2 water, color the water any color
a broken costume necklace in water
 decorative glass pieces in colored shampoo
 nuts, screws, other metal odds and ends
 cut up, colorful straws and buttons in water
 a few squirts of dish soap in some water
shmuzzies (pom poms) and rice
Fill your bottle (I like the small Gatorade ones but any one will work)
 add some hot glue to the inside of the lid and glue on. 
plastic play necklaces
 (I found these at the Dollar Tree,
I like the ones that have the connector to take apart)


a hand held mirror for discovering our faces and making some too!

an old cupcake pan for sorting balls into

a couple step stools to climb
Toddlers love, love to climb, it is a developmental stage
that they need to go through. 
Don't try to stop the climbing, just provide a
safe place for them to to do.

As always when playing with babies, close adult supervision is required. 


Pin It