Showing posts with label measuring. Show all posts

Friday, November 16, 2012

Using Ice for Pre-Writing Skills

I am always amazed how the simplest things can keep children engaged for so long.  The kids in my care love, love, love to use the pipettes (or those little medicine droppers).  It is so great for strengthening those little muscles needed for writing, cutting and all those other fine motor skills they will use so much in Kindergarten.  All I did was put out some ice trays, colored water, and a tub of ice cubes.  They mixed colors, learned about volume, cause and effect, sharing, and loads of language!  So simple and so many skills being used!


Pin It

Thursday, August 23, 2012

Beans and Tractors

This little man loves his tractors, and backhoes, and bulldozers and whatever big machinery you can think of.  He is always looking for things to load into his play trucks. I grabbed some beans that I keep just for play (cost about $2 dollars at the grocery store) and poured them into a pan for him.  He has played with this for days on end.  Loading, dumping, pushing. using his fine motor skills, problem solving, learning cause and effect, involving all his senses.  Who knew a bag of beans and some toy tractors could be educational.  It may look like he is only "playing" but he is learning, with every push, dump and scoop.  By the way, this little man is almost 2, in case you were wondering.  My almost 6 year old had almost as fun as the 2 year old. 


I store my "play" beans in recycled Gatorade bottles.  This is how I store my other items such as colored rice and pasta, aquarium rocks and whatever else we use in our sensory tubs.  It is easy to see what is in them and they line up nicely on the shelf.  You can also just let the kids play with the full bottles, with the lids tightly on. 

Pin It

Thursday, July 26, 2012

Cork Boats

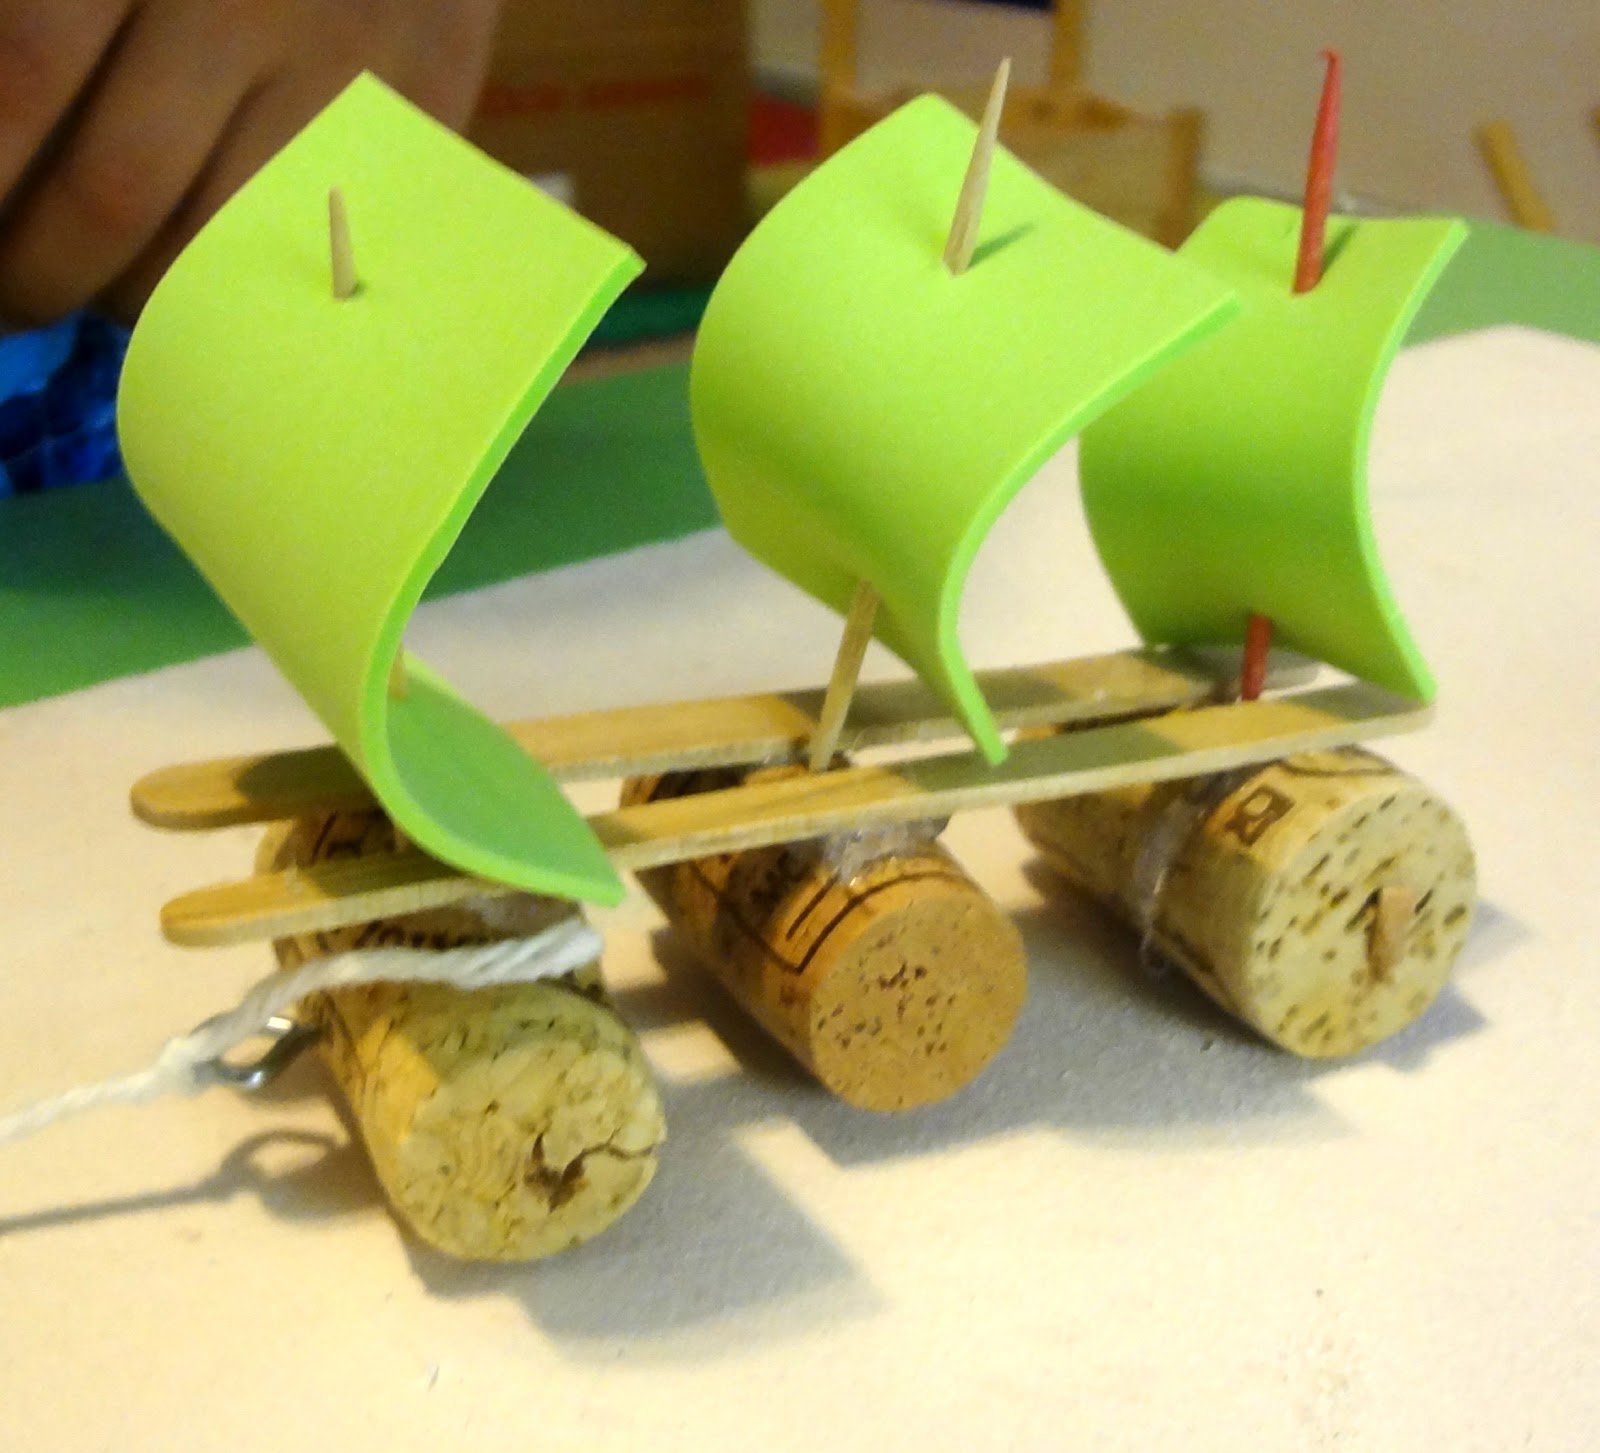
Have you visited A Little Learning for Two? If not, you should.  I saw these cork boats on her blog and thought they look super fun.  I borrowed a couple corks from our fabulous neighbors (along with their kids, thanks Kylea and Justin!).  The kids had a terrific time designing and creating their boats.  Here is what we used to make them.
-corks
-toothpicks
-craft sticks
-hot glue
-craft foam sheets
-screw in hooks
-yarn

I placed everything out on the table and invited the kids to design their boat using the materials on the table.  They did an amazing job.  I didn't provide them with any type of model, they came up with the design by working together and problem solving their way through the construction. 

We used hot glue to glue the sticks to the corks.

Screwed the hook into the front of the boat,

Here is one finished, they cut out their sails however they wanted.then I showed them how to fold it in half and push the toothpick in.  They did need a little help pushing the toothpick into the cork to hold the sails up.

Here is one that the girls designed.  I love it.  All about balance!

Here it is floating away in the little pool.

They even gave them a ride down the slide.

T designed his as a pirate ship.

They were a great hit, from start to finish! These were great for a warm summer day.  Now to go get some more corks (wink wink).


Pin It

Tuesday, June 19, 2012

Water Wall and Ice Balls

I have seen lots of water walls around like this ONE from Play Based Learning or this ONE from Teach Preschool, (both amazing and inspiring websites).  I have been wanting to try it but wasn't sure how to execute it on our wooden fence.  While cleaning out the shed, I found a box of storage containers and decided it was the perfect time to try it.  I used little nails and hammered the plastic containers to our fence.  Then I filled our table with water, although you can use whatever you have, of course.  I had made these giant ice balls (just fill a balloon with water and add a few drops of color), and was planning on using them in the sand box, but put them in the water instead.  It was huge hit with my son and a great way to cool off on a hot day!


Pin It

Monday, April 16, 2012

Colored Rice (The Easiest Way)

One of my kids most favorite sensory materials is colored rice.  It feels nice and makes a pleasant, soothing noise when dumping, measuring and pouring.  Playing with these types of materials help build math skills, small motor skills, color recognition, sensory awareness and language development.
 When I first began coloring rice, I use to put it in a ziplock baggie, add the color, add rubbing alcohol, zip it up, shake it, dump it out on paper towels to dry and try to keep the fumes from burning my eyeballs!  One day, I didn't have any rubbing alcohol, so I just added the color.  Much easier!
First, gather your colors.  We used THESE watercolors from Discount School Supply.  The process is super simple.  Pour some white rice (we bought a medium size bag at the grocery store for about $4), into a bowl.  We didn't measure, just poured in a good amount. 

Squeeze in some color
Stir it up (no need to add alcohol)  If you want it darker, just add more watercolor

Dump it into your tub and add the next color, no need to even rinse the bowl out, and the rice is instantly dry!


The colors come out beautiful and no stinky alcohol smell. 

Just a quick note, this batch of rice got caught outside in a rain storm  We let it dry out and it is perfect again.  It will last indefinitely, so this is a great little investment that goes a loooonnnngggg way

P.S.  This method works for coloring any pasta too!  You know for all those noodle collages and necklaces! 


Pin It

Thursday, March 29, 2012

Stringing Eggs

I saw this idea on Pinterest.  I was thinking this would be a fabulously fun, fine motor and math activity for my snake happy son.  We used plastic eggs and a pipe cleaner for ours, but you can see the original idea HERE.  I made a small knot at the end of the pipe cleaner so the egg ends wouldn't slip through.


I was thinking they looked a little like caterpillars, but Tayler saw his as a cobra snake.  So he stuck one of the eggs on the opposite way to create it's "hood".  Then he added eyes and left the pipe cleaner sticking out for the tongue.  Pretty dang cute cobra to me!
Another great fine motor skill.  You could incorporate patterning and counting into this as well.
Pin It

Wednesday, March 28, 2012

Stacking and Patterning

Here is a great way to use those plastic eggs.  Seperate them and use them to stack and pattern.  Easy, peasy, cheap and fun. 


Pin It

Friday, February 24, 2012

Smashing Balls (baked cotton balls)

I saw these awhile ago on Kiboomu and then was reminded of them again while I was poking around at Play Create Explore (seriously, such a great place to spend some time!).  They are BAKED cotton balls! So fun.  All you need is some flour, water, food coloring and cotton balls! Place them on a greased cookie sheet or aluminum foil, bake for about 45 minutes at 300 degree's. Yep, that's it.  Maybe a hammer too. 

Pretty, huh? 

mix 1 cup water, 1 cup flour

add some color (we used food coloring)

toss in the cotton balls and cover with mixture

place on cookie sheet (I covered it with aluminum foil because I didn't feel like chipping the mixture off).

Hand 'em on over to the kids!  Enjoy the action!

Update:  Apparently some people who tried this felt that the bottoms were flat and a little sharp.  Mine also had some edges on the bottom but I simply cut those edges off with scissors.  I would LOVE to hear what you did with them if you tried making them!

I also get many questions about what exactly to do with these.  For me, I think they are amazing.  You can use them the way we did, which helps improve hand/eye coordination, a great sensory and science experience and a nice lesson in cause and effect. Many people have asked me "What is the Point?" My answer is, why ask? Just try it.  There doesn't always need to be a "point" or end result for a kid to explore, create and just play. Part of playing is cleaning up, so I don't have any issues with the kids helping me clean the mess they created.  I also like to use trays when we have experiences like this, as it helps define the space they are using and contain the contents. 
Here are some other folks that have made Smash Balls and how they use them.  Feel free to leave a comment letting us all know how you used them.  Inquiring minds want to know!

Tot Treasures used them to make Dino Balls.
Wonderbaby used them as a sensory experience here
Loving My Nest made them here,
Lil Mop Top used them to practice their sight words here
and
Artsy Mama Creative Kids made them here.


Pin It

Wednesday, February 22, 2012

Robots using Recyclables

If you have been following me for awhile now, you know that my son LOVES to build and create.  Mostly he loves Lego's, but anything he can create and build with is right up his alley.  He asked if I would help him build a robot.  So we looked in our supply of recyclables for what he thought he might need.  This is what he chose;
- plastic lids
- tin cans of various sizes
- plastic bottles
- cardboard tubes
We got out the glue gun and began construction.  He began to get frustrated when his robot would not stand up (it was top heavy).  I suggested we add something heavier to the bottom of it.  He thought about it for a minute and then ran outside to get a couple rocks.  He stuck these in the bottom cans. He then named him Rock Robot and wrote that on the arms.  
I just smile looking at these cute robots. 
My kids worked so hard and did all their own construction and hot gluing. It took a lot of problem solving and truly enjoyed watching them come up with their solutions.
These were so fun to create.  I highly suggest you give it a try.

our supplies

Hot Gluing

learning about balance

language, writing, letters recognition, small motor

Rock Robot


Pin It

Friday, February 17, 2012

Cake Mix Playdough

I got this fabulous recipe from Lisa Murphy's Ooey Gooey Tooey book.   You will need:
1 box of cake mix (any type will do)
2 cups of flour
1 1/2 cups of salt
6 tsp of cream of tartar
6 tbls oil
3 cups of water
Mix it all in a bowl (we used an electric mixer).  Then pour into a pot and cook on medium heat until the dough begins to form a ball.  Plop it on the counter and let it cool.  Knead until it is soft and pliable. This play dough, if kept in an airtight container) will last for weeks.  It is so fun and smells incredible.


Pin It