Thursday, November 17, 2011

Handprint Turkey Keepsake

I found these little wooden plaques at the Dollar Tree and snatched them up.  They were perfect for making our turkey hand print keepsakes.  A great parent gift.  I asked the kids which colors they wanted and they painted their hands and fingers.  We did use acrylic paint, so we had to be very careful not to get it on our clothing.  When the paint dried, we added eyes, a waddle, beak and drew some feet.  I added "gobble gobble" and "November 2011" at the bottom.


Pin It

Wednesday, November 16, 2011

Felt Turkey Finger Puppets

We made these really cute, no-sew finger puppet turkeys to go along with one of our favorite songs
"5 Little Turkeys are We".
They are so simple and the kids really enjoyed personalizing them.  I cut all the pieces out from felt because it is difficult for little hands to do. I cut triangles for feathers and beaks, red waddles, and used brown half ovals (not sure what to call that shape) for the bodies.  Then, the kids glued the feathers onto one side of the brown bodies and then we glued the top body, leaving an opening to put our fingers in.  Then we used googly eyes and the other felt pieces to add faces.  Then we just needed to wait for all the glue to dry.
Here is the words to the song we use them with, but really any song about turkeys would work.

Five little turkeys are we,
We hid all night in the tree,
when the cook came around we couldn't be found,
that's why we're here you see!

Then we take one away and keep going...

Four little turkeys are we,

and so on...


Pin It

Tuesday, November 8, 2011

Magnetic Attractions

Here is what is in our sensory tub this week.  I got these magnet wands from Discount School Supplies.  Here is a link (magnet wands). You don't need these, although they are very cool and worth the small investment.  You can just use you refrigerator magnets, your kids alphabet magnet letters or those little round ones found at the craft store.  We cut up several pipe cleaners, added some metal lids and tossed in some of the alphabet letters from our playroom.  We are having so much fun discovering and making "hairy" wands.


Pin It

Thursday, November 3, 2011

Cornstarch Play Dough

We made this wonderful play dough the other day.  It came out so soft and pliable.  It did get a little crumbly, so keep that in mind if you try making this.  Here is the recipe.
2 cups baking soda
1 1/2 cups cornstarch
1 cup of water (add your choice of color to the water)
Mix all the ingredients together in saucepan.  Bring to a boil and cook until thick.  If he dough is too sticky add a little flour or cornstarch and knead. 


Pin It

Wednesday, November 2, 2011

Roots and Shoots

I did this experiment every year when I was in the classroom.  This is the second year we have done it at home.  You can find last years results HERE.  Just take one of those gorgeous ears of Indian corn and toss it in a shallow tub of water. Check it daily, because it sprouts quickly.  If you live somewhere warm, you can plant it and it will grow corn!  I promise, we did it when we lived in the warm desert.  It is so fun that the kids can see the roots and the sprouts at the same time.  We change the water every couple days so it doesn't get too stinky and slimy.  Such a great science experiment. 


Pin It

Saturday, October 29, 2011

Hammer Time...Pumpkin Style

This was a great big hit with my kiddos today.  I took one of our big pumpkins and put it in the table with golf tees and hammers.  I showed the kids how to hammer the tees into the pumpkin.  Once the tees were in there nice and tight, they were almost impossible to get out.  So, I got out the pliers and showed them how to use them to pry out the tees.  They felt so grown up, hammering and plying.  An all day activity for sure.  Great for hand/eye coordination, problem solving, fine motor development (you know, those muscle needed for writing), and language development, to name just a few of the things they were doing while they were hammering away!


Pin It

Friday, October 28, 2011

Pumpkin Pour Paintings

When I saw these at The Imagination Tree, I was so excited to try them.  What a great idea.  Here is how we did ours.  The kids had such a great time doing them and they are gorgeous!  You should definitely go check out the ones at The Imagination Tree.  Their are amazing!


Pin It

What Can YOU Do With Plastic Cups?

Awhile back, my son was obsessed with building with cups.  Currently, he just simply loves to build...with anything.  While walking through the grocery store, we saw a display of plastic cups and thought it would be fun to build with them again.  So, I bought two packs of them, for 4.00 each.  This is what we did with them....


built walls....

constructed castles.....


stacked them tall...and created patterns....


filled them up and dumped them out.....


used them as platforms....


and yelled in them.....feeling the vibration and hearing our own voice!
I am not sure if it is clear from the pictures but the children from age 1 to age 5 ( and me) had a fabulous time with these cups, literally, all day. Yes, a few of them got crunched but that is the worst thing that happened!

We also learned about balance, physics, math solutions, volume, cause and effect, patterning, colors...and so much more, all while playing with cups! 
So simple, so fun, so educational!


Pin It

Thursday, October 27, 2011

Squish Prints

We just love doing these.  There is something so satisfying about squirting and squishing!  All you need is some paint and paper.  Have the kids squirt paint onto their paper (I put paint in empty and washed out glue bottles).  Fold the paper over and squish and push the paint around.  It is really neat to feel the paint moving under your fingers.  Then when you open it....voila, a super, duper painting. We added googly eyes to our prints because, well, because the kids asked for them!


Pin It

Wednesday, October 26, 2011

Shmuzzies and Bottle Caps

I wasn't going to write about this (I just take pictures all day long) but the kids had so much fun with it and really, there is lots of learning going on with this I just had to write a post on it.  I bought these extra large shmuzzies at Hobby Lobby and they are perfect for little hands. I have them in a container and we sort them into egg cartons and muffin pans, stuff like that.  The other day, my daughter got out our box of bottle caps and began making "cupcakes" with them.  She sorted the bigger shmuzzies and put them on the matching lids, the green on the green, purple on purple, then she placed all of the "cupcakes" onto a larger plastic lid and "served" us.  It was great! 
 I wonder what your kids will come up with if you place some out for them? Let me know if you do this.  I love hearing how little minds create!


Pin It

Saturday, October 22, 2011

The Colored Ghosts

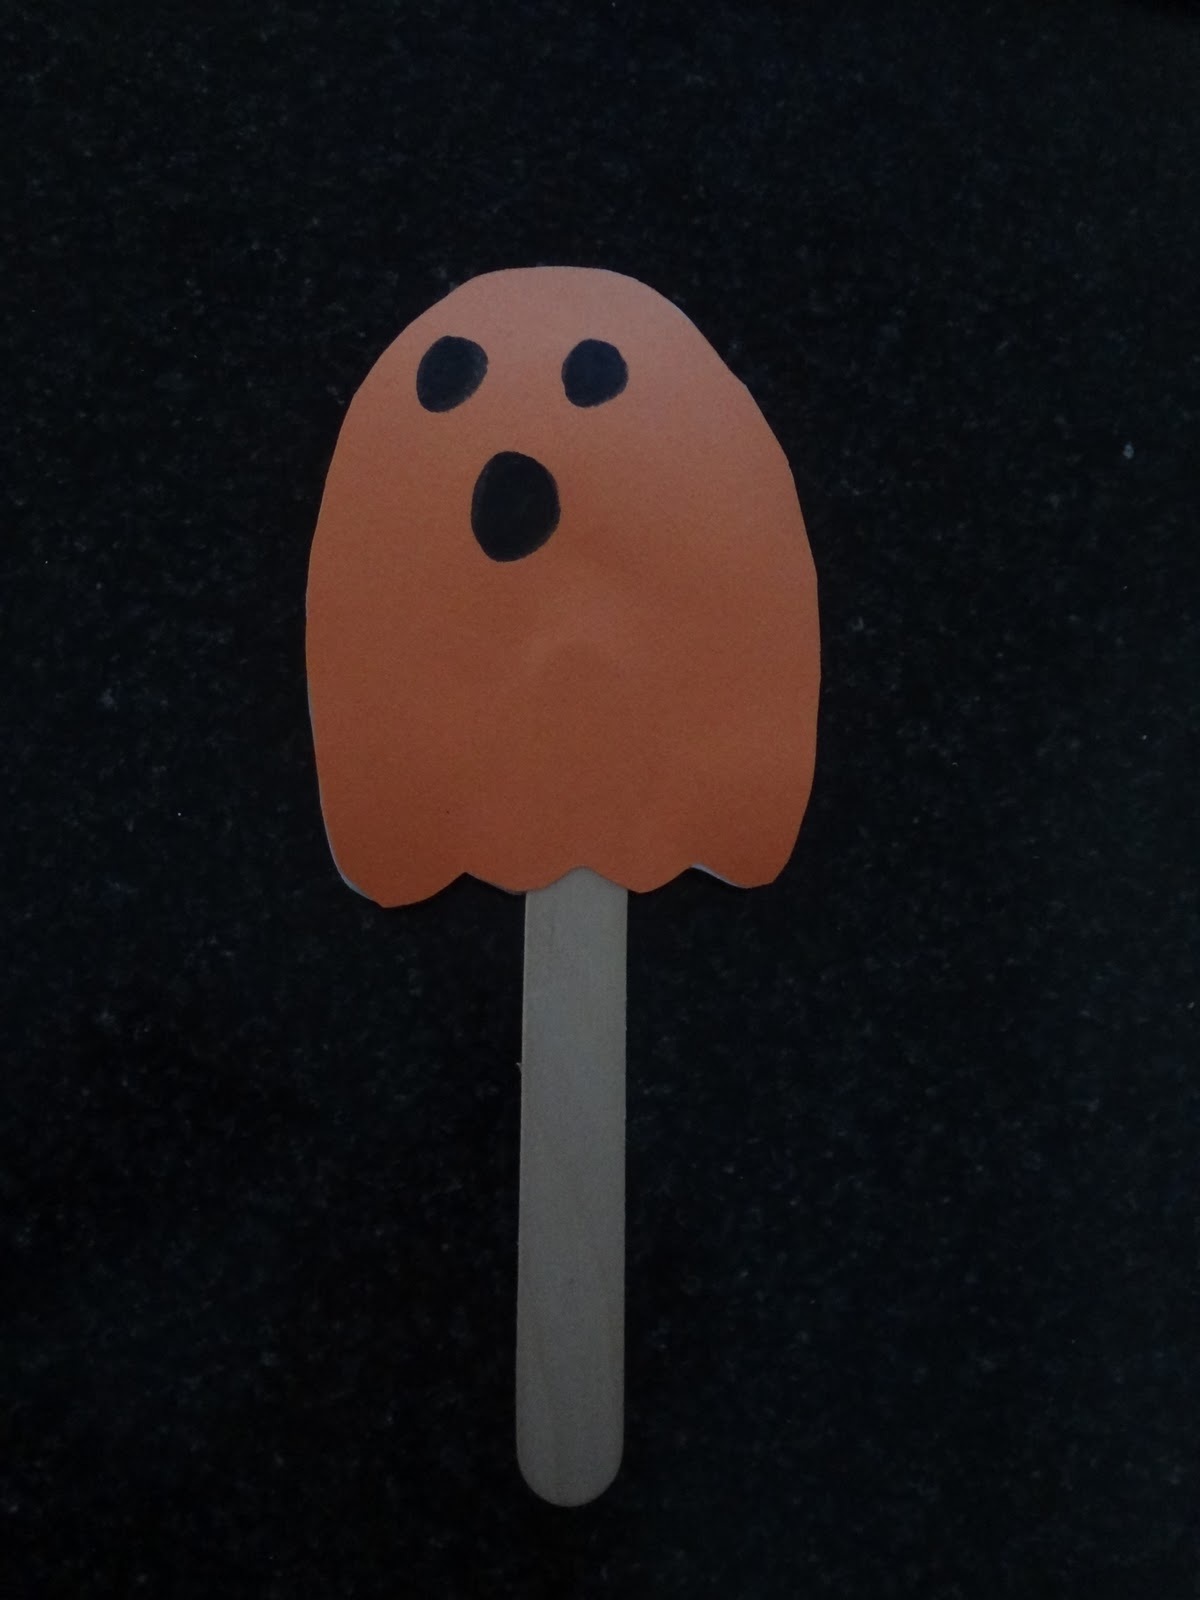
I was reminded of this story by my friend, Meagan.  We told this over and over again when we were teaching together.  I honestly have no idea who I learned it from, I'm thinking it was in a college class a million years ago!  All you need is some colored paper and white paper. You don't even need to put them on puppet sticks, just makes them easier to hold.  Cut out a colored ghost and a white ghost together and glue them together back to back, so one side is colored and one side is white.  I drew happy faces on the white side and surprised faces on the colored side. I am telling you, the kids will want this one over and over again.  I told it 3 times in a row yesterday.  It just never gets old.  So this is how I tell it, obviously, you can use whichever colors and foods you want.


Once upon a time, there lived a family of ghost.  The mommy ghost needed to go to the grocery store to buy some more white food.  Ghost only eat white food such as, mashed potatoes, milk, vanilla ice cream, yogurt, cauliflower....(what ever other white food you or the kids think of). She warned the ghosts not to eat any food that wasn't white while she was gone.
So the ghost went outside to play.  While outside, one of the ghost found a strawberry in the garden.  "One little strawberry will be okay," said the first little ghost. Hold up the red ghost so the kids only see the white side.  So she popped the strawberry in her mouth and POP, she turned red. Turn around the ghost and show the kids the red side.  OHHH NO, and she floated away to hide.


The next ghost found a blueberry in the garden and popped it in his mouth without even thinking about it.  Whoops, he turned bright blue, then he floated away to hide.


The next ghost was very hungry.  He didn't want to turn blue or red like the other ghost. He found some broccoli and it looked so delicious that he couldn't help himself.  So he gobbled up that broccoli and POP, he turned green.  He floated away to hide.


The next ghost had been playing so hard and was very thirsty.  Mommy had told them not to EAT anything, so maybe it would be okay to have a drink.  So she drank a nice glass of orange juice.  POP!  She was orange!


The last ghost thought about it very carefully.  He was hungry, but didn't want to turn any color....he was happy being white.  So, he found some chocolate chip ice cream.  "It is mostly white," he thought.  So, he ate a whole bowl of chocolate chip ice cream.  POP! He turned chocolate chip!!  Oh my goodness, and he flew away to hide with his brothers and sisters.


When the mommy ghost came home and saw her colored ghost (Hold up all the ghost, colored side out), she knew what had happened.  She gave them all a big glass of nice white milk and sent them to bed.  When they woke up in the morning, they were all nice and ghostly white again (hold up the ghost white side out).


That is how I tell it.  I would love to hear if you have a different version or if you tell this story too!
Thank you Meagan for the reminder!

Pin It

Friday, October 21, 2011

Where's My Mummy?


We have been books and crafts recently.  I guess it easy this time of year.  So, after reading this (super cute) book, we made "jar mummies".  They were so simple and the kids were very excited to light them up.  We simply painted clean, glass jars with DIY Modge Podge, (1/2 water, 1/2 white glue).  Then we wrapped the jar with tulle, (I have tons of tulle) but you could easily use cheese cloth or heck, even white paper.  When they were happy with the wrapping part, they added some googly eyes.  The "mummies" dried overnight and then were ready for a candle and to sit in the window and glow.  Easy peasy and cute, cute, cute!


Pin It