Friday, December 5, 2014

Hot Chocolate Paint


Who knew hot chocolate made good paint?  We tried this the other day and it was a big hit, not to mention, smelled fantastic!


We mixed some hot chocolate mix, with baking soda and a bit of water.  Sorry, I don't have exact measurements.  I just added and mixed until I had the consistency of paint. We used baking soda because it's what I grabbed first, but I think corn starch would work too. 


The kids had a great sensory experience with it and wiped the container clean of the paint.


It's a great way to get your chocolate craving with out all the sugar! Fun, fun, fun! 
Please let me know if you try it. 


Pin It

Wednesday, November 19, 2014

Canoe, Canoe?

How fun are these little canoes.  You have everything you need right now to make these!


- paper towel roll
- crayons (or markers, or paint, or whatever you want)
- scissors
- stapler (or glue depending how patient you are!)


I cut this one in half, but you could leave it whole too. 


Cut the middle out of the paper roll.


  Have the kids decorate with your choice of medium. We used crayons so we would be able to play with them right away.  Staple the ends together and BAM...done!


So fun and easy, right? Enjoy!


Pin It

Tuesday, November 18, 2014

Ice Popsicle Paintings

Painting with ice is a fun way to create and is a great sensory experience for little ones.  We have painted with ice cubes before but I thought the kids would be able to paint longer if their hands weren't frozen.  So, I froze water in popsicle makers.


We sprinkled powdered tempera on our papers.  Empty spice shakers are perfect for this!


Then I let the kids create away.  


Good, icy fun!


Pin It

Monday, November 17, 2014

Tee Pee / Wigwam Preschool Craft

We had so much fun making these cute little wigwams.  We had a discussion on what a "home" can look like and included igloos and wigwams in our discussion.  We made these paper plate wigwams to use with our little painted peg people.


We cut a paper plate in half and then colored our designs on it.  We collected some sticks from outside and taped them to the inside of  the plate.

(tape sticks inside, sticking up a little)


Then we rolled the paper plate into a cylinder shape and stapled it shut.  Cut your little door and your done.  Easy, cheap an super fun.  


Pin It

Sunday, November 16, 2014

Ice Crowns


Okay well, not really, ice.... but "icicle looking" might be more accurate. My kids loved making these and squeezing the glue bottle onto the triangles is an excellent fine motor strengthening skill.  Yay!
Here is  how we made them,

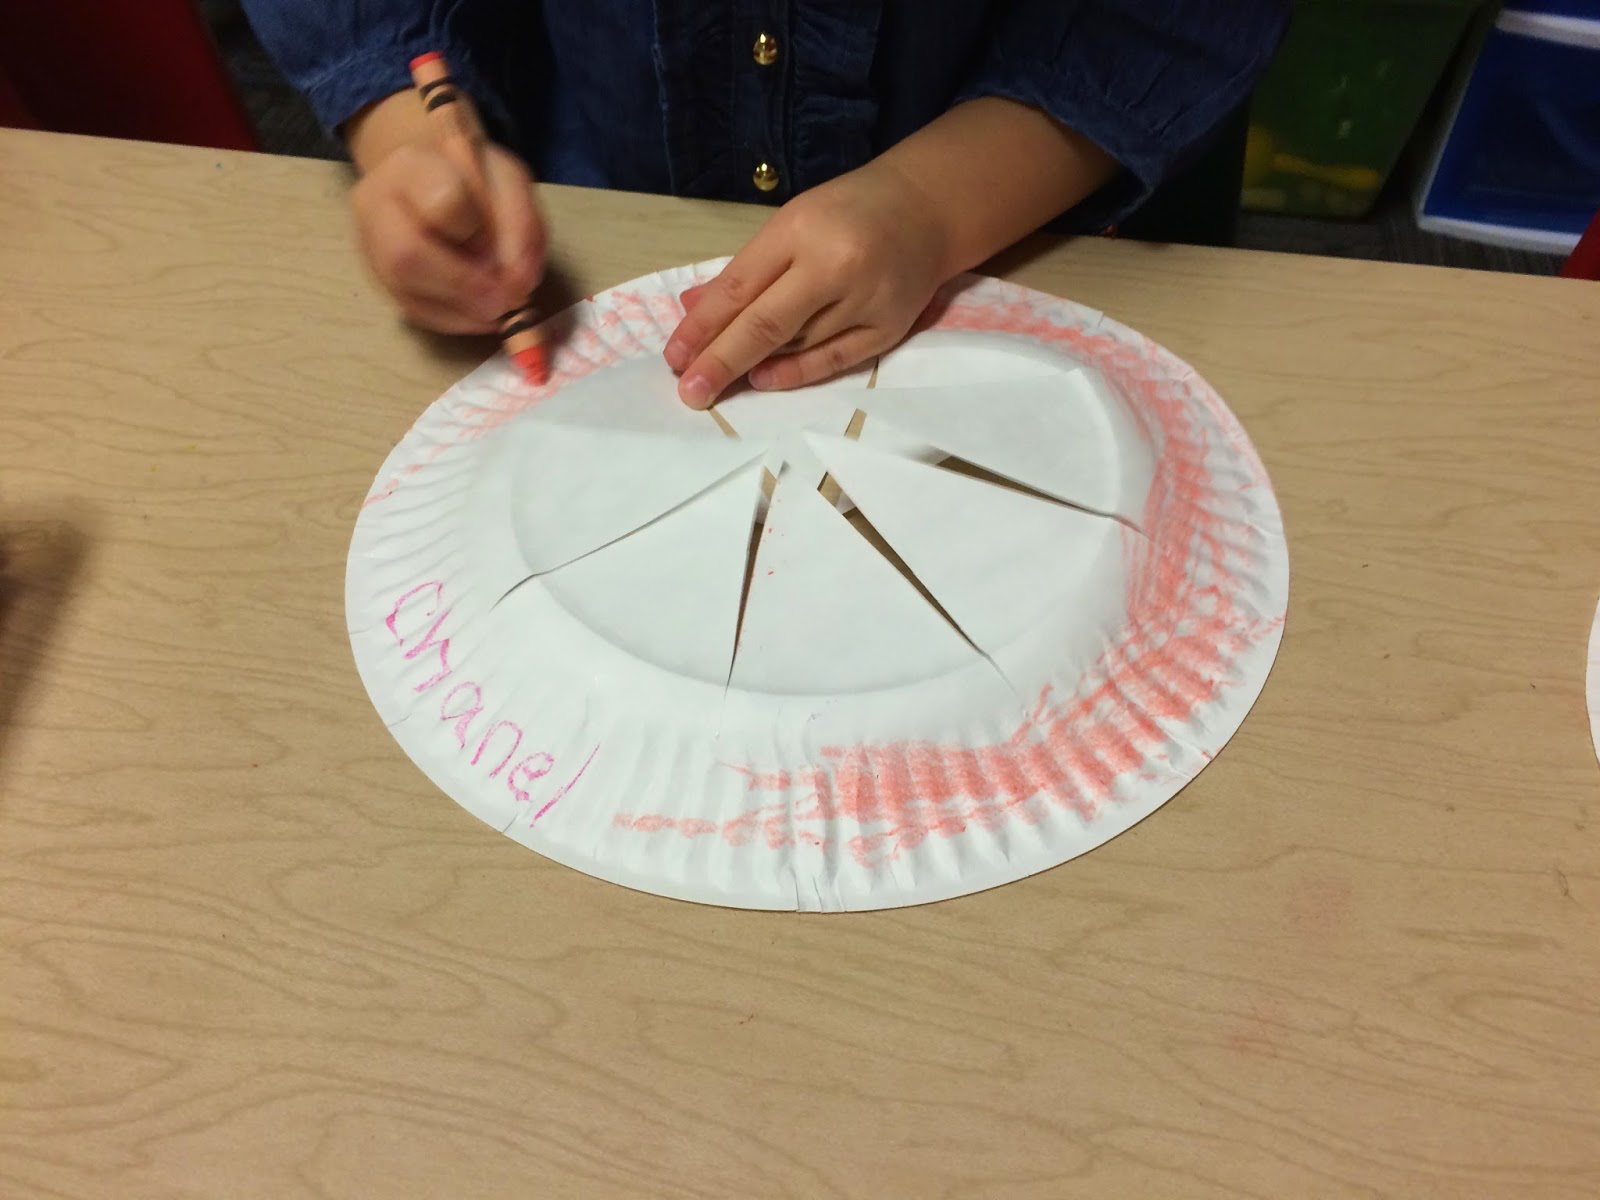
First, fold a paper plate in half,


Cut triangles through center.  When you unfold the paper plate, you might need to cut a few more triangles on the sides.


The kids used crayons first to color around and on the crown.  Then we folded up the points and added some glitter glue.


Then put it on and do a little ice dance!  Or not, whatever.  Some of my kids have very large brains so I had to cut the crown and staple a little strip of paper to help the crown go around their little heads.  
Enjoy!


Pin It

Thursday, September 25, 2014

Play Dough and Potato Heads

The kids love to use the potato head pieces with the play dough.  I just love seeing what characters they create with them.  I will post a recipe for the absolute best play dough I have ever made, but before that, check out some of the play dough people my Little's created.


Here is the best play dough recipe I've ever made.
2 cups flour
1/2 cup salt
1 tsp Cream of Tartar
2 Tbls oil
2 cups of water 
you can either add a packet of Kool Aid, or food coloring if you wanted to add some color.
Mix it all in a sauce pan and stir on medium/high heat.
Stir and stir until it begins to form a ball.  Dump the dough onto the counter and allow to cool.  When it cools, knead it for a few minutes and your done!
So easy and super soft.  If you keep it in a zip lock baggie or air tight container, it will last weeks.

Pin It

Tuesday, September 23, 2014

Plastic Glove Painting

This was so fun.  The kids had to really squeeze the gloves to get the paint to drip out, which means they were strengthening their hand muscles.  It was fun to squirt out the paint in such a different way. 

First, I squeezed the paint into the glove. I added a little water to thin the paint so it wasn't too difficult to get out.  Then I tied off the glove and punctured a couple of the fingertips with a push pin.  Then I handed the gloves over to the kiddos.  


 This is how the painting ended up, which is AWESOME!   When most of the paint was squeezed out the kids to actually painting with the gloves.  They had a great time and had an entirely new painting experience.


Pin It

Monday, July 14, 2014

Camping Color Scavenger Hunt

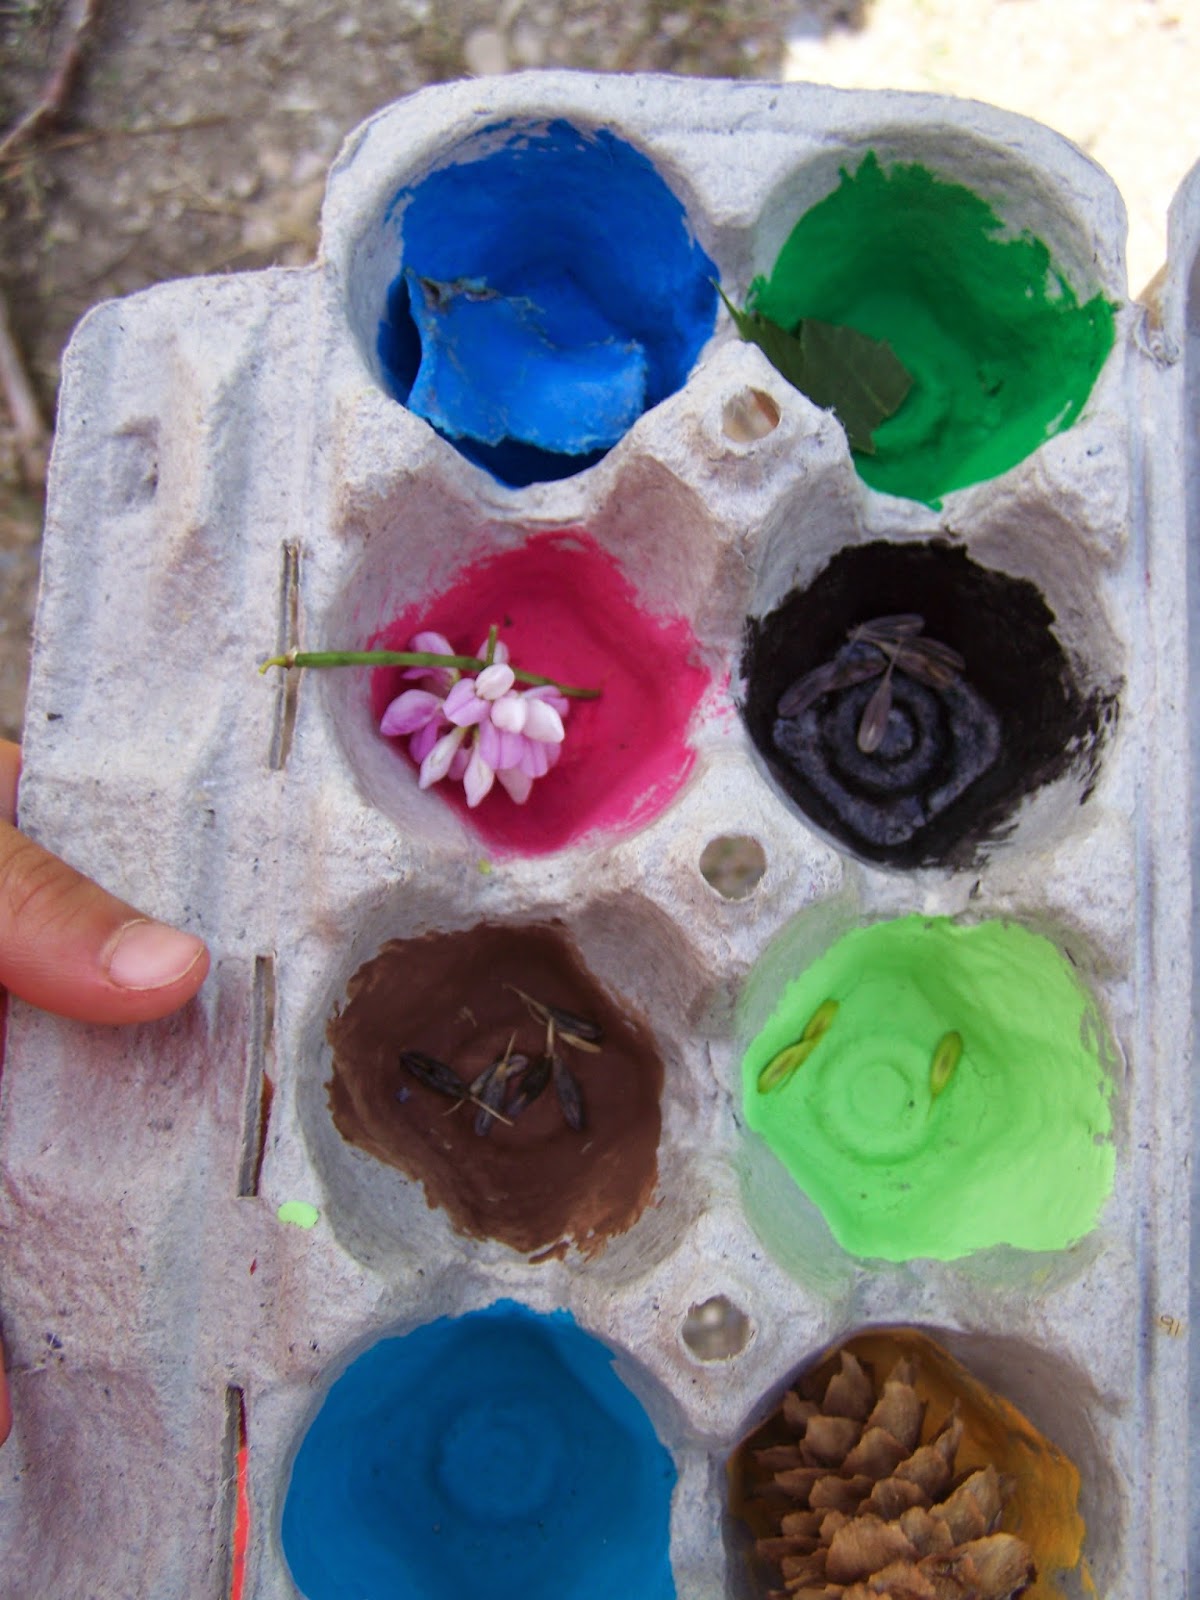
We love to camp in the summer. One activity that keeps our kids busy is a color scavenger hunt.  We painted the inside cups of an egg carton various colors.  When we get to our destination, the kids grab their cartons and begin their hunt.  It keeps them busy while we set up and it can be done over and over again.  


I'm always amazed at what makes it in the carton.

I love all the flowers that made it in this one!
Happy Color Hunting!


Pin It

Wednesday, May 21, 2014

If You Give a Mouse a Cookie

Are you familiar with the books by Laura Numeroff?  One of my favorites to start the school year off is "If You Take a Mouse to School".


After reading the story, we created some paper mouse faces.  I love how unique and individual the mice are.


Then we did a little math, using chocolate play dough and glass beads.


We tried duplicating the science experiment the mouse did in the book.  We used baking soda and purple tinted vinegar.


In the book, the mouse creates a mouse house with blocks, so we made little pipe cleaner mice (instructions here), and then made them some houses.  


Such fun activities to go along with the story.  I really enjoy tying books into learning experiences.  It really helps bring the books to life for the kids. 


Pin It

Thursday, May 8, 2014

The Day the Pirates came to Preschool

I had a couple kids in my class who loved to play pirates.  I thought it would be a good way to tie in the letter X and have some fun pirate play at the same time.  


I created some pirate ships using boxes and laundry baskets.  I added some fabric flags and painted X's on them.  I attached the flags to the "ships" with small PVC pipes and duct tape. These were a huge hit and the kids sailed the high seas for hours. 


We used our language, small motor and creative skills to create our own pirate treasure maps, where X marks the spot!  We drew our maps with  Sharpies, crumpled them up a bit and painted them with tea, to give them an old weathered looked.


We used a lot of energy to smash balls of aluminum with plastic and wooden hammers to make our own coins, then added our "mark", X, of course!


We manipulated some "pirate play dough" (play dough with coffee grounds in it, recipe below)


We used toothpicks or "mini swords"  with our play dough, for our swashbuckler preschoolers!


We made some pirate hats, cut out two strips and made an X to decorate them.

Finally, we discovered that some pirates had slipped in and left us clues, written on X's to lead us to their treasure!  It was very exciting.  

We followed the X's and found the pirate treasure.


Inside of the treasure box, we found all sorts of "gold"!  Goldfish, Rolo candies, and some pretend gold coins.  There were also some X's included. We split up our booty and ate the Goldfish for snack.

We also read several books about pirates.  Here are a few that I have found.  
(FYI, affiliate links included)


In case you wanted to try making some pirate play dough, here is the recipe.
2 cups flour
1/4 cup salt
1 Tbsp of oil
2 Tbsp Cream of Tartar
1 cup water
1/4 cup of coffee grounds.
Heat it all up in a pan.  When it begins to come together, take out and knead.  You may need to add some more flour, if it's a little sticky.  


Pin It