Tuesday, October 12, 2010

Soup's On

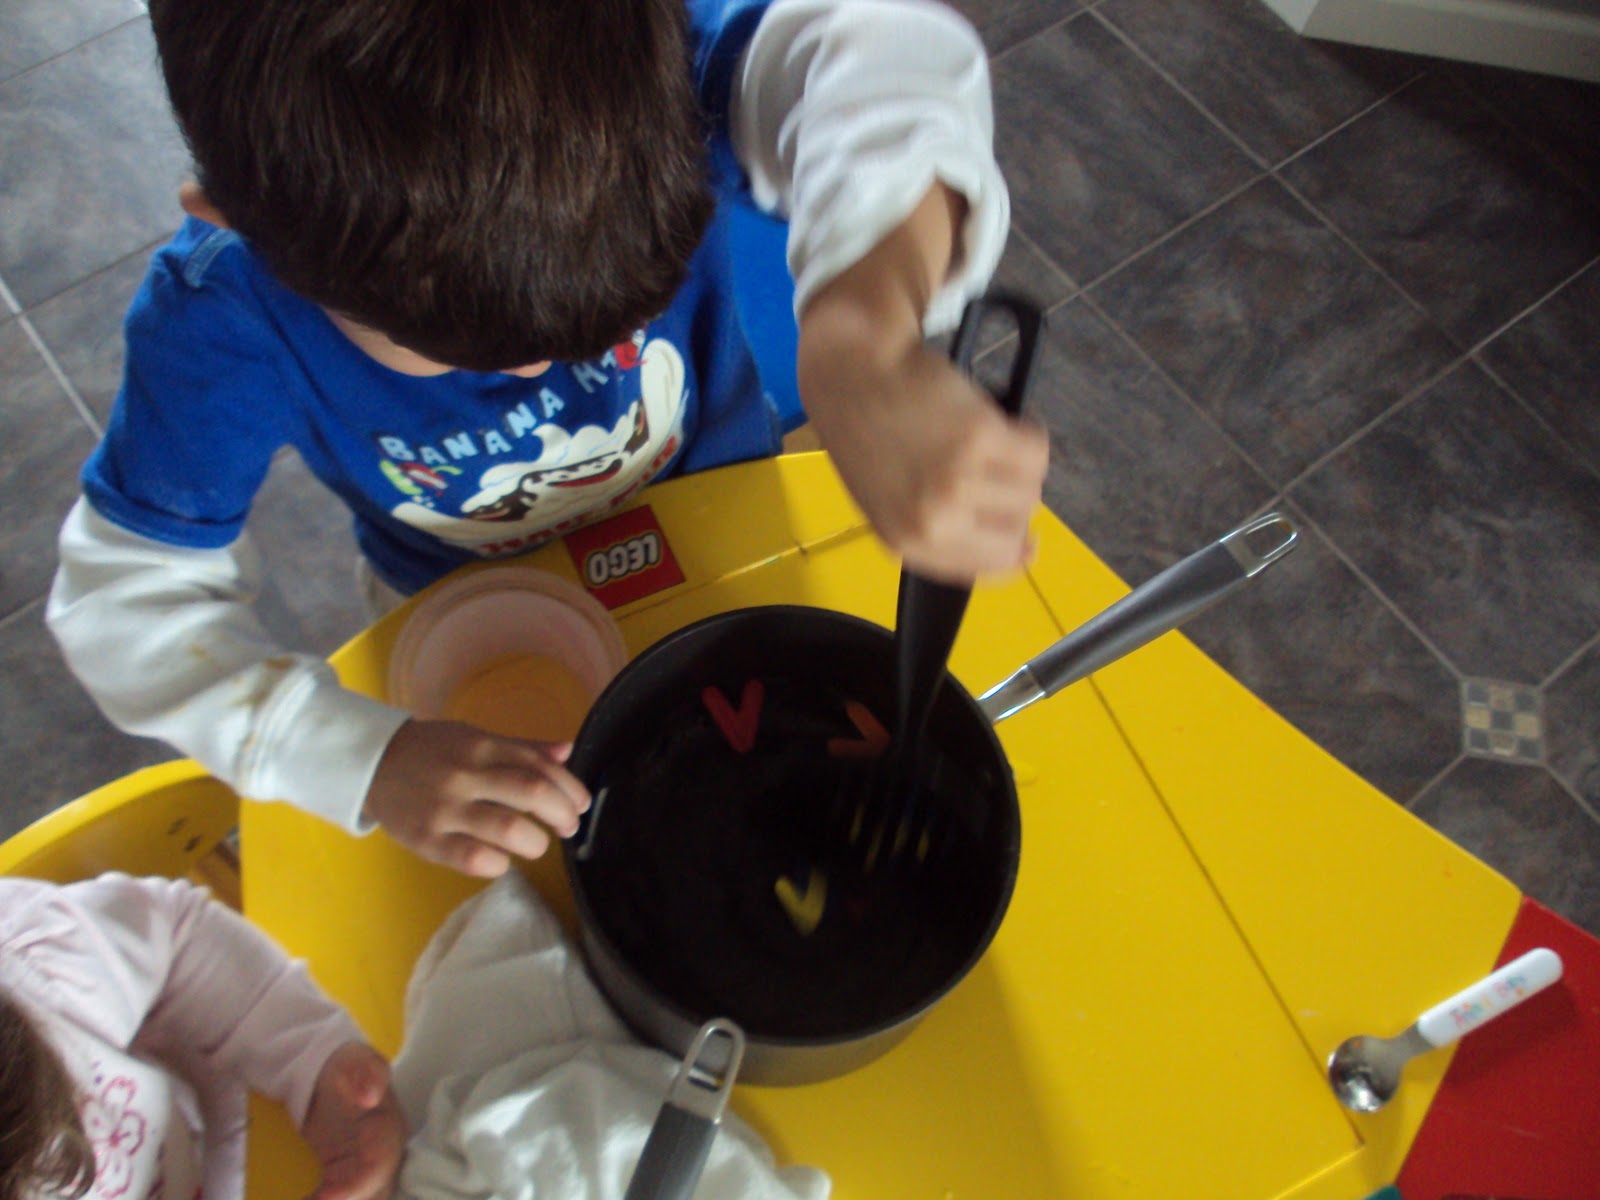
What is better on a cold, blustery, rainy day than soup?  We put a little water in some pots and the kids added foam letters.  They stirred and stirred, "careful, it's hot" and then tasted.  It needed a little bit more spice.  Then they served it up.  It was amazing how the N's tasted nutty, the T's were tangy and tasty, and the Z's tasted just like zucchini.  This was a great letter recognition and sound game, as well as, fun imaginative play.  All you need is a pot, some water, spoons and some plastic or foam letters.  You could even write letters on bottle top lids if you wanted.  Delicious!


Pin It

Sunday, October 10, 2010

Glue Ghosts


Okay, this is a super, simple project that kids do naturally with glue anyway.  Start with a bottle of glue and some wax paper.  We added google eyes, but those can always be drawn on too.  Just let the kids puddle a pile of glue onto the paper.  The only trick is that all spots have to be filled in with glue.  Otherwise, the ghost won't peel off properly.  Let dry overnight or longer.  Carefully peel it off the wax paper and let it finish drying on the other side.  I used a hole punch to put a hole through it so we could hand it.  Super easy and super fun.  You don't have to limit yourself to ghost.  You could color your glue and make all sorts of shapes.  The possibilities are endless!!  Good fine motor skill, creativity, cause and effect, observing glue go from a liquid to a solid and fun, fun, fun.


Pin It

Saturday, October 9, 2010

Cup Stacking

My son loves to stack cups and make the tallest towers.  We save and collect all variety of cups and containers.  This is such a simple and easy activity and is a great lesson in patients, balance, symmetry and creativity.  We are big on cup stacking.  The best part.....building it so high, you can run through it.  Amazing!!

Pin It

Friday, October 8, 2010

Marble Transfer

Another great fine motor skill.  I found these little tongs and knew they would be put to good use in our house.  This time we used them to transfer marbles, big and small, to a glass jar. We also tried transferring with a spoon but R didn't find that to challenging.  When the marbles made it into the jar, they made a satisfying "clink".  She kept coming back to this all day.  Kids need those little pincher muscles for writing, so this could be considered "pre-writing"! 


Pin It

Thursday, October 7, 2010

Pumpkin Season

At the beginning of the summer we decided to plant some pumpkins in our little garden patch.  It was a very exciting process for the kids to watch.  From planting the seeds, seeing the sprouts come up, watching the vines grow, and grow, and grow.  Then tiny, little, green balls began to form.  Before we knew it we had lots of great orange pumpkins.  It began to get colder at night, so we took them off the vine.  Here is the lot that we ended up with.
We took the green ones off the vine because we were afraid they would freeze.  They ripened up nicely.  We had a blast carving them up and scooping out the seeds.  Then I cut out the pumpkin, roasted in the oven and blended it up.  We have had pumpkin seeds, pumpkin muffins, pumpkin cookies, pumpkin bread. 
Yumm-O 

Then we took to hammering them!  We used Dad's golf tees and their play hammers.  They had a great time with this.  Great fine motor skill too...giving those little hand muscles a good workout!


What are you doing with your pumpkins??

Pin It

Bottle Top Man

We have tons of bottle tops that we use for all sorts of stuff.  Sorting, patterning, tossing, making bottle top soup...you name it.    They were sitting on the table and T began to put them together.  I didn't know what he was doing and didn't ask either.  I just stood over him and snapped some pictures (got the camera a little late to document the beginning stages). The final product, he declared, "Bottle Top Man".  He is so original with his names!  I love when they do their own thing.  It really is the simplest items that bring out the greatest creativity!


Pin It

Bubble Brew

So this activity could not be any easier or more fun!  My kids did this for so long and kept coming back to it.  Let me preface this with the fact that we have done all sorts of activities that include blowing through a straw as opposed to sucking through it.  We have blown cotton balls, blown paint around paper (water it down a little first), blown the wrappers off the straw at restaurants, just to name a few.  So they knew what I meant when I told them to blow through the straw.  If you try this with your kiddos, practice blowing first, please.  Otherwise, they will most likely suck up a horrible mouthful of Bubble Juice!!    All you need is a bowl, a couple squirts of liquid dish soap and some straws.  I placed a towel under us because the tile gets slippery with the soap.  Then we just blew, blew, blew!  We had a contest to see who could make their bubbles the biggest.  It was such fun.  (If your bubbles are popping to soon, just add more soap).  Bubbles are the perfect example of surface tension...a great science activity.  Bubbles are actually thin balls of liquid with air trapped in the center.


Pin It

Wednesday, October 6, 2010

Ceramic Play Dough


Another great play dough recipe.  I use this one when we are making stuff that we want to keep.  It hardens really well and does not crack.  No baking or anything special.  If it is wet or cold out, it may take a couple days to dry out completely.  I turned the letters and hand prints every once in a while to let it dry evenly.  My favorite thing to do is to make imprints of the kids hands or feet.  Such a great memento of their size at whatever age they are at. I had some buttons and the kids choose which ones they wanted and pressed them into the form before it dried.  I used a straw to put a hole in the top so I could add a ribbon later.


 Okay, so here it the recipe.
1 1/2 cup salt
3/4 cup of corn starch
1 cup of water
Mix it all in a pot and cook over a low heat, stirring frequently.  Dough will start to form a ball.  Take out and begin to knead...(let it cool a bit) 
This dough can be colored as you cook (I add the color to the water) or it can be painted after it hardens. 
Pin It

Eating and Reading

I often try to mix our two very favorite things....eating and reading.  We really like Eric Carle books, with the beautiful watercolor illustrations and simple words. " Brown Bear, Brown Bear", "The Very Hungry Caterpillar", and on and on.  We were stuck on "The Grouchy Ladybug" one particular grouchy day, "Hey you...you wanna fight?" is what the ladybug asks all sorts of different animals throughout the book.
 So I thought it would be fun to make our own "ladybug" snack.  I put some cream cheese in a bowl and added a couple drops of red food coloring (science, observation, coloring recognition).  I let the kids stir it until the cream cheese turned the right color.  We used plastic knives to spread it on plain rice cakes and added raisins for the spots (math, counting, fine motor skills, life skills).  Then we ate up our "ladybugs".  My son wasn't too keen on the cream cheese and asked if he could make a brown ladybug with peanut butter. 
 I love "cooking" with the kids.  It is so empowering to them and they are more willing to try new foods if they prepare it themselves.


Pin It

Monday, October 4, 2010

Meet "Leaf"

I really wish I would have taken pictures of T creating this little guy.  We were having so much fun.  We went to the park and were noticing all the leaves changing colors.  Well, my little collector had to gather up some of those colorful leaves.  I did not want to vacuum up crumbled leaves all afternoon so I got out the contact paper and asked him if he could make a friend.  We discussed what his "friend" would need....a head, feet, arms, etc.  I kid you not, I did not help him make this leaf man.  It is purely his design.  When T was finished, I covered the leaf man with another sheet of contact paper and cut him out.  Then T glued on eyes and a mouth.  I just love the way it came out.  He named him "Leaf" and put him on the refrigerator.Pin It

Thursday, September 30, 2010

Button Gloves

I actually made these gloves years ago for my 4 year old class who had not yet mastered the snapping fingers skill.  They would put them on and then click, click their way through songs. 
 

My daughter stumbled upon them in my music box and they were an instant favorite.  She not only clicked them together, but clicked them on the tile, table tops, oven....anything!  So much fun to make new sounds.


 I bought little kids gardening gloves and then just hot glued random buttons to the fingertips.  Easy as that!  Now teaching them to get each finger in the separate holes....not so easy, but a great skill to learn!
Pin It

Wednesday, September 29, 2010

Sticky Feet


We were doing a project with contact paper the other day and I noticed that my kids only wanted to stick and un-stick their little hands to the paper.  My son was very impressed with this one sided sticky paper and kept asking me "what is this called".  So I figured I should go with their flow and cut a big piece.  Then, we taped it to the kitchen floor with some packing tape all the way around it.  Then I let them have at it. They really loved stepping and jumping on it with their bare feet and listening to the "squish, squish" sound.  It really is a different type of activity for kids.  It encourages large motor skill development as well and sensory and tactile exploration.  The next time we do this, I will cover a much larger space with the contact paper so they can really run across it!Pin It